
Attic Master Bathroom Renovation
/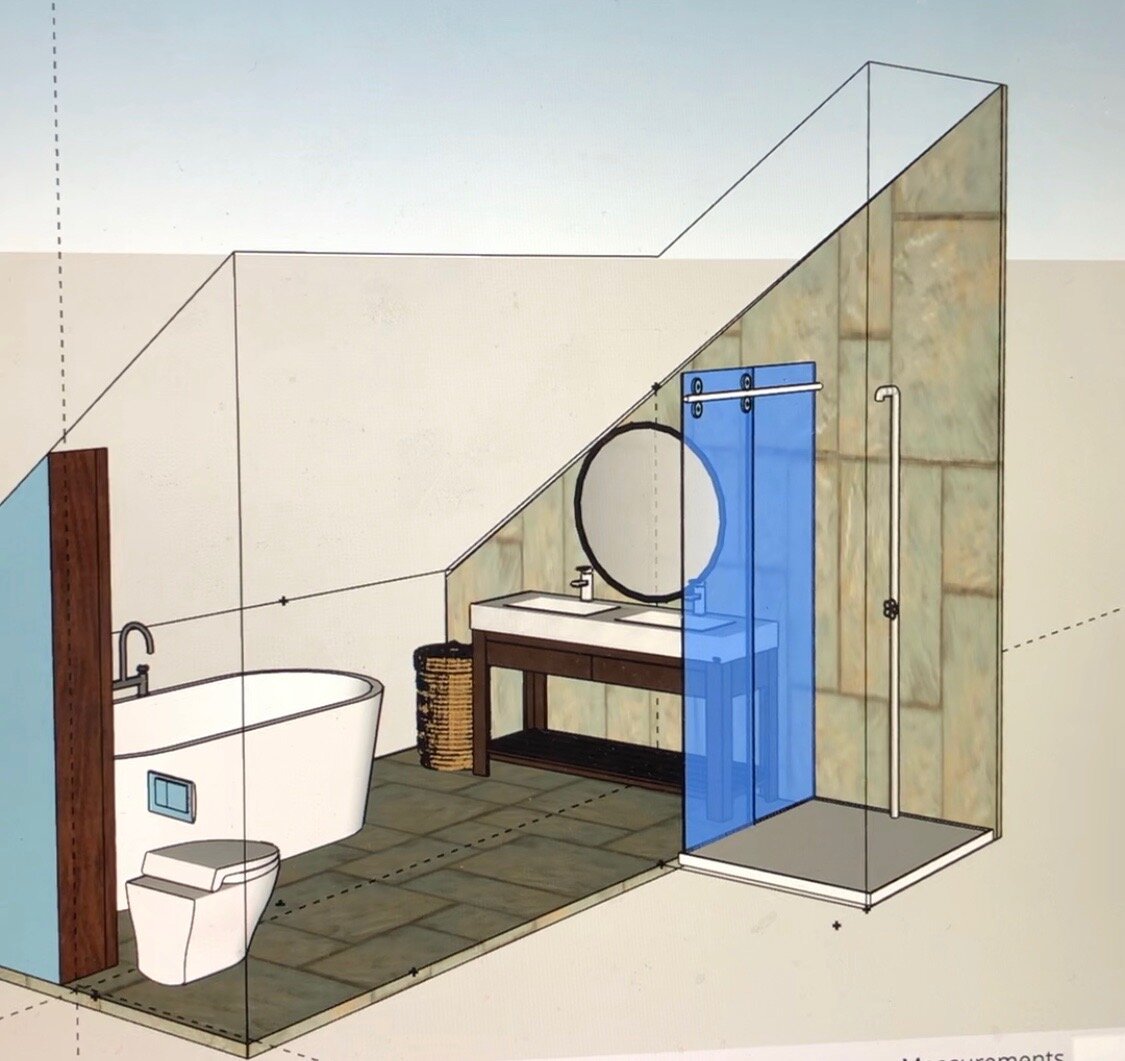
The original 1980s-state-of-the-art master bathroom was not actually a room but had a “cool” open concept vibe to it with the bathtub exposed to the bedroom making itself a focal point. At least the toilet was separate (oh thank you!) but with no separate shower it was not very practical (neither warm nor private) to take showers in the middle of master suite. To make it work we had to (a) enclose the whole bathroom for privacy and comfort and (b) to add a separate shower and hopefully a second sink because, you know, it’s a master bath. Easy to say, but where would you place two additional fixtures on a basically same footprint? “The room to be” is under the sloped ceiling which makes half of it being under 7' high and is considered unlivable floor space according to the codes. OK, here is the trick. To be able to use every square Ft we need to use every cubic Ft. So we decided to raise the ceiling by cutting into the roof and adding two skylights. One above the freestanding tub hence you can actually stand in it, and another to add some head clearance when you are using the vanity.
Before and during
Here is the picture of my husband demolishing the private quarter of the original bathroom where the toilet used to locate. Another one is showing exposed roof reframed for the new skylights.


New bathtub moving in
For the new freestanding bathtub we choose it to be not lightweight acrylic. It would be just too easy to install it on a second floor of the house. Our bathtub was made out of resin stone, composite material, and weighed 500 lbs. It was clear that such a heavy and large scale piece of stone would not fit through the staircase making its way up to the dreamy location under the skylight. In the adjacent bedroom we were working on adding a balcony. The timing was right for lifting the tub on the new balcony platform (yet without the railings), cutting the opening for the future patio door, getting the tub in through the new opening, and installing the door - all in one day.


To be continued…